Showing posts with label Firmware. Show all posts

Wednesday, June 4, 2014

How to upgrade Cherry Mobile Flare S2 to Xolo q700s Firmware

Cherry Mobile Flare S2 and Xolo Q700s alike?


Have you been working so hard to get a mod and or a custom ROM for your Cherry Mobile Flare S2 while on the other hand, its OEM version Xolo Q700s enjoys a lot of mods and custom ROMs? This article will help you.

Following the guide below will help you upgrade, migrate, convert or whatever you say it, your Cherry Mobile Flare S2 into Xolo Q700s' official firmware, and with that, it allows your Flare S2 to easily port custom ROMs and also enjoy the ROMs which are made for Xolo Q700s too.

flare s2 to xolo q700s
But why I need to convert my Cherry Mobile Flare S2 firmware with Xolo Q700s'? Simply because Flare S2 has a different region or partition which made it difficult when porting ROMs, and since its OEM version, Xolo Q700s, has a lots of mods, it is very wise to use that advantage to upgrade the firmware so that Flare S2 can also enjoy the mods available for Xolo Q700s

Let's proceed to the guide below to get the upgrade started.

How to upgrade Cherry Mobile Flare S2 to Xolo q700s' official firmware


Disclaimer: Please read and understand what is told. Do it at your own risk. Upgrading firmware is sensitive and can possibly brick your phone when done wrong so be careful. We are not responsible for any damages it may possibly cause.

Advantages:

  • Converts Cherry Mobile Flare S2 to Xolo Q700s
  • Can apply ROMs, mods, etc that are made for Xolo Q700s
  • Simply, more tweaks and mods
Here are all the things you need:

Note: After downloading all necessary files, extract Xolo Q700s firmware and Xolo Usrdata and Cache in ONE folder only anywhere in your computer (let's name the folder Xolo Q700s Firmware). Also extract SP Flash Tool anywhere you want, then install Drivers Auto Installer (run install.bat and just wait for it to finish installing the drivers).
Steps:

1. Open SP Flash Tools and run Flash_tool.exe
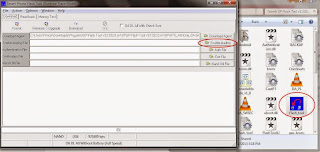

sp flash tool

2. Click Scatter-loading, a new window will appear looking for the scatter file, go to the Xolo Q700s Firmware folder and select MT6582_Android_scatter_emmc.txt and click Open.

3. The Xolo firmware is now loaded therefore all partitions in the list are checked automatically, if not are all checked automatically, you have not placed the Xolo Q700s and Usrdata and Cache in the same folder so put them in one and load the scatter file again.

4. Switch OFF or turn OFF your phone. When it is already off, plug-in the USB cable to your computer but NOT in your Flare S2.

5. Click on Firmware > Upgrade

6. Plug-in the USB cable to your Flare S2 and after few seconds, SP Flash Tool will detect your phone and it will start the upgrade.

7. Wait. If you see this image below appeared, the tool has finished the upgrade.

download ok

8. Disconnect or unplug USB cable from your phone to your computer.

9. Reboot your phone to recovery mode (Press and hold Volume up + Power button at the same time and wait until you need to choose recovery, press Volume down)

10. Do all wipe. Wipe cache partition, Wipe data/factory reset, go to advance and Wipe dalvic cache

11.Now go back and reboot system. Done!

Congratulations! You now have successfully upgrade your Cherry Mobile Flare S2 to Xolo Q700s!


Credits to Sotie Arlos FuentesKards Le Sharpeye


Friday, May 16, 2014

Stock ROMs / Firmware for MyPhone Agua RIO


Good day AndroidHowdies! If you are looking for a stock ROM or official firmware for your MyPhone RIO, then, you have came to the right place.

Here are the compilation of Stock Firmwares / ROMs for MyPhone Agua RIO which you can use as a base for creating you own custom ROM or just to get a fresh ROM without mods or anything.

rio stock rom
Thanks to our very important contributors namely Sir Edmhar Laoag and Sir Red for helping us and sharing their works for the development of the said device.

Disclaimer: Always flash at your own risk!  We, as well as the contributors and the developers, are not responsible for bricking your devices or any possible damage it may cause.

Golden Rule: Always backup before flashing.

Stock ROMs Flashable through CWMR / TWRP


Stock ROMs / Firmwares for MyPhone RIO S5500


Deodexed Stock ROM - ported from Explay Fresh Stock ROM, credits to Sir Edmhar
  • Removed bloatwares
  • Added New Gesture - Wave to change picture while browsing in Gallery.
  • Zipaligned
  • Can install apps to SDcard
  • Already Swapped SD to Phone Storage
  • Smoother than V1.16
  • Fresh, no tweaks and mods
  • Can be used as a Base ROM

Stock ROMs / Firmwares for MyPhone RIO S5501


Deodexed Stock ROM v1.17 - Mirror Link - credits to Sir Red

  • Unrooted
  • Deodexed
  • Zipaligned

Deodexed Stock ROM - ported from Explay Fresh Stock ROM, credits to Sir Edmhar
  • Removed bloatwares
  • Added New Gesture - Wave to change picture while browsing in Gallery.
  • Zipaligned
  • Can install apps to SDcard
  • Already Swapped SD to Phone Storage
  • Smoother than V1.16
  • Fresh, no tweaks and mods
  • Can be used as a Base ROM
  • After flashing this ROM, immediately flash this UPDATE v1.2 from recovery.
          • Added Browser
          • Added Playstore
          • Replace Explay Camera to Stock Camera

How to Flash From Custom Recovery?

To fully understand what is flashing, visit this article which discusses flashing apps, mods, and ROMs.

Requirements:

Instructions:
1. Download the Stock ROM and place it to your phone's SD card storage
2. Reboot your phone to Recovery mode (CWMR or TWRP)
3. Do Wipe Data/Factory Reset, then Wipe Cache Partition, go to advance and Wipe Dalvik Cache
4. Install Zip from SD card
5. Choose Zip from SD card, select the Stock ROM that you have downloaded.
7. Select YES to Install
8. Wait until its through
9. Reboot
10. DONE!

For Flashing UPDATE v1.2

Instructions:
1. Download the UPDATE v1.2 and place it to your phone's SD card storage
2. Reboot your phone to Recovery mode (CWMR or TWRP)
3. Install Zip from SD card
4. Choose Zip from SD card, select the "UPDATED v1.2" that you have downloaded.
7. Select YES to Install
8. Wait until its through
9. Reboot
10. DONE!


Credits: XDA, MyPhone Groups, Edmhar Laoag, Red