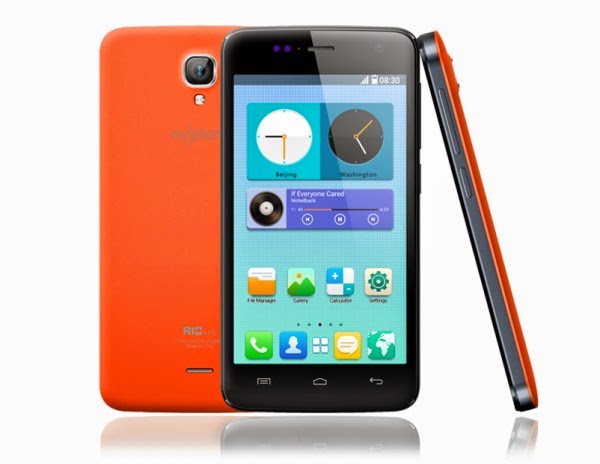
Tuesday, June 3, 2014

ClockworkMod (CWM) Recovery for MyPhone Iceberg

The ClockworkMod (CWM) Recovery came to MyPhone Iceberg


After getting your MyPhone Iceberg rooted, the most suggested way is to flash custom recovery. Talking about custom recovery, what comes first in mind is the ever famous recovery from ClockworkMod. Getting this custom recovery allows more customization of any android device including MyPhone Iceberg.

myphone iceberg
Proceeding your readings, you will discover how to get Clockworkmod (CWM) recovery installed on your MyPhone Iceberg android smartphone. We have made up step by step instructions in order for you to safely flash it successfully. Just follow the guides as instructed and in no time, you'll enjoy your new custom recovery powered by ClockworkMod.

How to Flash CWM Recovery on MyPhone Iceberg


Here's the agreement. You must flash at your own risk. Thought the below mod is tested, it still has the possibility to damage your device. Anyways, it is your choice to do this.

Requirements:
Instructions:

1. Download all the requirements. Put the CWM recovery image in your phone SD card and rename it as recovery.img

2. Open Mobile Uncle Tools, if it asks for root-access, grant it.

3. Go to Recovery Update, select recovery.img then tap OK.

4. Wait for the app to flash the CWM recovery image. It should reboot you phone. If not, tap on Into Recovery Mode to reboot your phone to recovery.

5. Now, check your new custom recovery. Enjoy!

Note: After flashing the custom recovery, it is recommended to backup your current ROM. Find out how to backup with CWM recovery.


Monday, June 2, 2014

Flashable Stock ROM for MyPhone Rio Lite

Here's Stock ROM made for MyPhone Rio Lite


So you've been looking for a Stock ROM? Most probably, you are searching for this because you want to go back on your Stock ROM state or use it as a backup or even use it to make your own mod, well, I guess you are lucky for finding out this article that will answer your problem.

myphone rio lite stock
Continuing this article will help you how to go back to your previous Stock ROM state of your MyPhone Rio Lite through this ROM list flashable from a custom recovery such as CWMR / CTR / TWRP or through SP Flash Tool that is capable of fixing your device even you have bricked it.

Flashable Stock ROM's available for MyPhone Rio Lite


Note: Though the ROMs are tested, please flash them at your own risk. We are not responsible for any damage it can possibly cause to your device.

Stock ROM flashable through Custom Recovery


Requirements:
Features:

  • Not Deodexed
  • Not Swapped
  • Not Partitioned
  • Remains the current Recovery


Stock ROM Download Link:

Instructions:

1. Download the Stock ROM.zip and place it to your phone's SD card.

2. Reboot your phone to Recovery (CWM, TWRP, CTR, don't do this if you own Stock Recovery). Press and hold Volume Up + Volume Down + Power Button at the same time, further press Volume Up.

3. Optional, backup your current ROM. Go to backup and restore select backup.

4. Now, select Wipe data / Factory reset, select Wipe cache, go to advance and then Wipe dalvik cache.

5. Select install zip from SD card, then select choose from internal / external SD card (wherever you put the Stock ROM.zip). Select the Stock ROM.zip and wait for it to install the stock ROM.

6. Once it's done, select Reboot system to restart your phone.

7. Enjoy the stock ROM.

Additional Notice: If you want to unroot your MyPhone Rio Lite, follow this unrooting guide.

Stock ROM flashable through SP Flash Tool


Requirements:
  • MyPhone Rio Lite with USB Cable
  • Computer running Windows
  • SP Flash Tool - Download here
  • USB Drivers - Download here
  • 7-Zip for extracting zip files - Download here
  • MyPhone Rio Lite Stock ROM (download below)
Features:

  • Completely Restores Stock ROM including the Stock Recovery
Stock ROM/Official Firmware Download Link:


Instructions:

1. Download and install USB Drivers on your computer. This will allow your computer to detect your device even on Preloader.

2. Download both SP Flash Tool and Stock ROM then extract them to any preferred location you like in your computer.

3. Don't plug-in your phone yet. Open SP Flash Tool.exe then click Scatter-loading then find and select MT6582_Android_scatter.txt in the folder where you extracted Rio Lite's Stock ROM.

4. Make sure that the Preloader, DSP_BL, Cache, and Usrdata are NOT checked and others must be checked. Now turn OFF your phone. When your phone is already turned-off, proceed to step 5.

rom backup restore

5. From SP Flash Tool, click Download then immediately connect your phone to your computer using USB Cable, don't turn-on your phone.

6. When you see a red and blue colors loading at the bottom of SP Flash Tool, it means the tool detected your device and it will restore the Stock ROM of MyPhone Rio Lite so just wait.

7. When the below image appears, you are done reverting to Stock ROM. Now, disconnect the USB Cable from your phone and turn on your MyPhone Rio Lite.

rom download

Congrats! You have now the Stock ROM.


credits to Gregson II Marvey Tee


CTR / CWM Recovery for MyPhone Rio Lite

Carliv Touch and ClockworkMod Recovery for MyPhone Rio Lite?


Just like any other MTK-based android smartphone, MyPhone Rio Lite has already ClockworkMod Recovery available which you can use basically on flashing mods and using other additional features in it most especially doing nandroid backup and restore. But today's article will not just be ordinary guide for you to get CWM recovery installed on your MyPhone Rio Lite because on this article, I'll be sharing too the CWM-based recovery which supports touch function, the Carliv Touch Recovery also known as CTR.

myphone rio lite cwm
The following is the guide how will you able to install CWM Recovery and Carliv Touch Recovery on your MyPhone Rio Lite. We have made this easier for you so all you have to do is carefully follow and understand the steps that we have put up.

How to Install CWM and CTR Recovery on MyPhone Rio Lite


Disclaimer: Flash the custom recoveries at your own responsibility.

Flashing Carliv Touch Recovery


Features:

  • CWM-based so it is just like CWM
  • Touchscreen Support

Requirements:


Optional:


Instructions:

1. Download and install Mobile Uncle Tools on your MyPhone Rio Lite.

2. Download and put Carliv Touch Recovery image on your phone's SD card. It's filename is recovery.img

3. Open Mobile Uncle Toos, if it asks you for root permission, grant it.

4. From Mobile Uncle Tools, tap Recovery Update then choose the recovery.img which is the Carliv Touch Recovery.

5. Select OK and wait for the app to flash and update the recovery.

6. Once done, tap Into Recovery Mode to reboot into recovery.

7. Done. Try to check your new custom recovery.

Note: The CTR screen might rotate but it does not harm at all.

Flashing ClockworkMod Recovery


If you don't want the touch supported custom recovery above, follow this guide how to install CWM recovery that works on MyPhone Rio Lite.


credits to Miyer Bernabe


How To Root MyPhone Rio Lite


Way to get MyPhone Rio Lite rooted


MyPhone Rio Lite is another budget, quad-core smartphone which comes in a lighter version of the original Rio. And just like the original Rio, some mods are also applicable to this lite version from which we are going to show you on this article.

MyPhone Rio Lite has the same root exploit with its original version. Before we get started on the procedures on how to root the said device, it is always recommended to understand what is rooting, otherwise, let's get started.

myphone rio lite

Guide How To Root MyPhone Rio Lite


Disclaimer: Root your device at your own risk. Don't blame us for the damage it may cause.

Optional:
Backup your unrooted MyPhone Rio Lite using this guide.

Requirements:

Instructions:


1. Download and install Framaroot. (Be sure that Unknown sources was enabled on your phone Settings > Security.)

2. Open Framaroot, select Install SuperSU.

3. Tap Barahir. Proceed and wait for the app to root your MyPhone Rio Lite.

4. Done. Reboot to properly load the changes.


Play High-End Games with GLTools (Graphics Optimizer)


Howdy! So, you have issues with playing games huh?! Probably you are having a budget smartphone or tablet that can't really support high-end games like Real Racing 3, NBA 2k14, Dead Trigger, etc. Fortunately, android developers heard your problems and develop an app capable of making lower-end android device feel the high-end gaming experience.

gltools 2
Let me introduce GLTools, an app that allows customization of resolution and graphics rendering of apps for optimizing gaming experience. With GLTools, it will allow you to play games which actually requires higher specs or rather play games with lesser lags and FC (force close). If you are familiar with what this app can do, it might be you have heard of Chainfire3D, but, this one supports any android versions starting from android 2.2 and above with lesser issues.

What this app can do? Check out below:

  • Change resolution and rendering bitness in any app, even if it doesn't support that by default.
  • Change GPU name and enjoy enhanced graphics even on a noname low-end GPU.
  • Take full control over textures: now you can decompress/recompress them (even if your GPU doesn't support that texture format) and resize. Note that decompression feature is available only if you'll install a plugin (internet is required to do that)
  • Optimize shaders on-the-fly for optimal performance (the same optimizer is used in Unity3D engine by default)
  • Enable MSAA or CSAA in any app to improve graphics quality (make sure that your GPU supports that)
  • Measure gained performance with a nice onscreen FPS counter (or you can output FPS information to Logcat if you are a pro)
Additional Notice
  • Root and a writable /system partition are required! - Follow this guide to root your device.
  • OpenGLES 2.0-compatible GPU + ARM processor, x86 processors are not supported (Galaxy Tab 3 for example)

How To Use GLTools? Understanding the Settings


Caution: As you have read, it can support android versions 2.2 and above, however, most users of this app reported and recommended that it works best and safer on rooted Android 4.1 to 4.3 Jelly Bean devices with custom recovery. If you're device does not, it is your choice to use this. GLTools is not 100% stable.

Disclaimer: Use this app at your own risk. We are not liable for any damage it may cause.

Make sure you have rooted your device. Also, just a reminder, it works best on Jelly Bean devices.

Before anything else, backup your ROM just in case somethings went wrong.

1. Download and install GLTools. Download the Free Version or Paid Version.

2. Open GLTools, read and understand the check list below before checking all the check boxes. Select Install. Wait for your device to reboot. There will be an uninstaller of the GLTools flashable through custom recovery, it can be found on your SD card.

3. Again, open GLTools then select the Game you want to play.

gltools

4. Check Enable custom settings for this

Here's the tweaking part

5. Check Force 16 bit rendering. (it reduces lighting and shading effects but not much a biggie in the graphics)

6. Check Optimize GLSL shaders. (for optimizing OpenGL shading responsible for color, texture, structure)

7. Enable and set Downscale texture as what you like. (It reduces the texture therefore, lesser lag)

8. You may want to Use fake GPU info. (Can also improve game graphics quality and performance)

9. Now, it's done. Play any games you wanted.

How to completely uninstall GLTools?


1. Simply reboot to custom recovery.

2. install zip from SD card then choose uninstall-gltools.zip

3. Wait and GLTools will be uninstalled.


Credits to XDA


[Easy Guide] How to Unroot Any Android Device

Why unroot your android device?


Once an android user attempts to optimize his android device's capability, rooting android is always a frequent recommendation as it can allow modifications to the system software of any android device, whether a phone or a tablet. But, there are cases that you need to bring your android device to its service center for tuneup or whenever there's somethings gone wrong with the device out of the box and you need to unroot it to restore its warranty. When you are in a situation like that, this article might help you.

root any android
If you are looking for a guide on how to completely unroot your Android device (phone or tablet), you're in a perfect place. The guide below will be showing the methods of unrooting most android devices.

How to Unroot Any Android Device


Before anything else, backup your ROM first just to be safe.


Manually Unroot Any Android Device


1. Download and install any file explorer/manager on your device which  is capable of accessing the root system. For those who doesn't have one, here's ES File Explorer which is a free downloadable app from Google Play Store.

2. Open ES File Explorer or any similar app.

3. From the ES File Explorer or any similar app, tap on the slash symbol "/", but if you are using Root Explorer, tap on the the plus button "+" below and select Root Tab or something like that. If it asks you for root access, grant it.

Now we need to delete the su file from bin or xbin folder.

4. Now, go to System > Bin > folder and find the su file, if there's any, delete it. If there's none, proceed to step 5.

5. Go back to System folder and open the Xbin folder. Find the su file and delete it.

6. Navigate back to System folder and delete the superuser app you are using. Delete either Superuser.apk or SuperSU.apk.

Unroot Any Android Device with SuperSU


1. Open SuperSU app from your phone's app drawer or app list.

2. Navigate to Settings tab.

3. Find and select Full unroot.

4. Let the app to process your request. Done!

Unrooting Any Android Device using Framaroot


If you have used Framaroot to root your android device, you can use it too for unrooting it. This works especially when you have Qualcomm, MTK-based android device, etc..

1. Download and install Framaroot in your android device.

2. Select Unroot.

3. Click Boromir for MTK-based, Gandalf for Qualcomm-based, Aragorn for Samsung,

4. Wait and you are done.

Sunday, June 1, 2014

Flashing CWM Recovery on MyPhone Agua Hail

Getting CWM recovery on MyPhone Agua Hail


Got your MyPhone Agua Hail rooted? If yes, why not proceed with flashing custom recovery to your device? Like any other android users like you who want to modify and tweak their android devices, it is absolutely necessary to get a custom recovery installed in your android device. Most developers create flashable zips of their mods to get it installed from a custom recovery since even complex mods turned easier to install with that. Talking about a custom recovery, the recovery which comes first to our minds is ClockworkMod or CWM due to its popularity.

myphone agua hail cwm
In this guide, we, Siong Esteban (MyPhone Agua Hail developer) and yours truly, will be providing the steps on how to flash ClockworkMod (CWM) recovery on your MyPhone Agua Hail.

Steps on how to flash CWM recovery on MyPhone Agua Hail


Disclaimer: Flash at your own risk. We, together with the developer, are not liable for any damage it may cause to your device. We are just trying to help you here.

Optional:

Flashing Custom Recovery (CWM) Guide

By Siong Esteban

For MTK MobileUncle Tools for flashing
Requirements:
Instructions:

1. Put the myphone_agua_hail_cwm.img to your SD Card (external).
2. Install MTK_Mobile_Uncle_Tools_2.9.5.apk.
3. Open/run MTK Mobile Uncle Tools.
4. Go to Recovery Update.
5. Then select myphone_agua_hail_cwm.img.
6. There will be pop ups, just choose Yes.
Note:
If myphone_agua_hail_cwm.img doesn't show on Recovery Update, rename it to "recovery", it should be like "recovery.img".
If doesn't work, try the instruction for Rashr - Flash Tool below.
  
For Rashr - Flash Tool
Requirements:

Instructions:

1. Put the myphone_agua_hail_cwm.img to your SD Card (external).
2. Install Rashr.apk
3. Open/run Rashr - Flash Tool
4. Press Flash Recovery
5. Then select myphone_agua_hail_cwm.img.
6. There will be pop ups, just choose the positive buttons (Yes, yes). 
Note: If myphone_agua_hail_cwm.img doesn't show on Recovery Update, rename it to "recovery", it should be like "recovery.img".
If doesn't work, try the instruction for MTK MobileUncle Tools

Done!


Enjoy your new recovery! It is recommended to immediately backup your ROM as soon as you have successfully flashed CWM recovery. Visit this link how to easily backup your MyPhone Agua Hail ROM using CWM recovery.